# Build Step
Start a deployment, click on "Import", then select your connected git account.

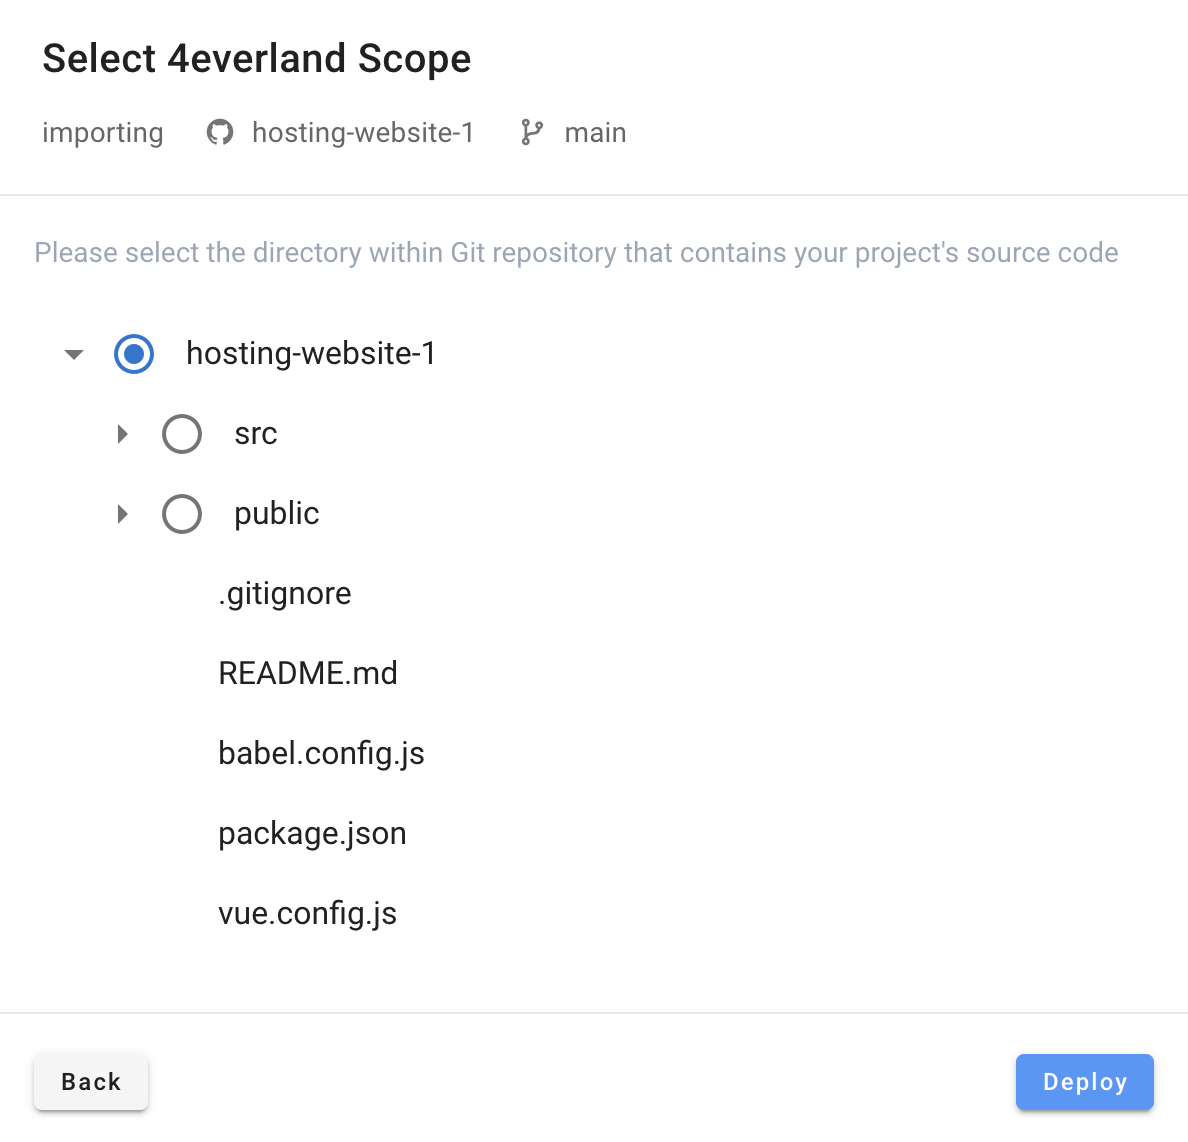
# Step1: Setup Root Directory
Setup the root directory, for most of the project just keep it default, for monorepo, a sub directory could be selected, this is where npm install and build command runs.
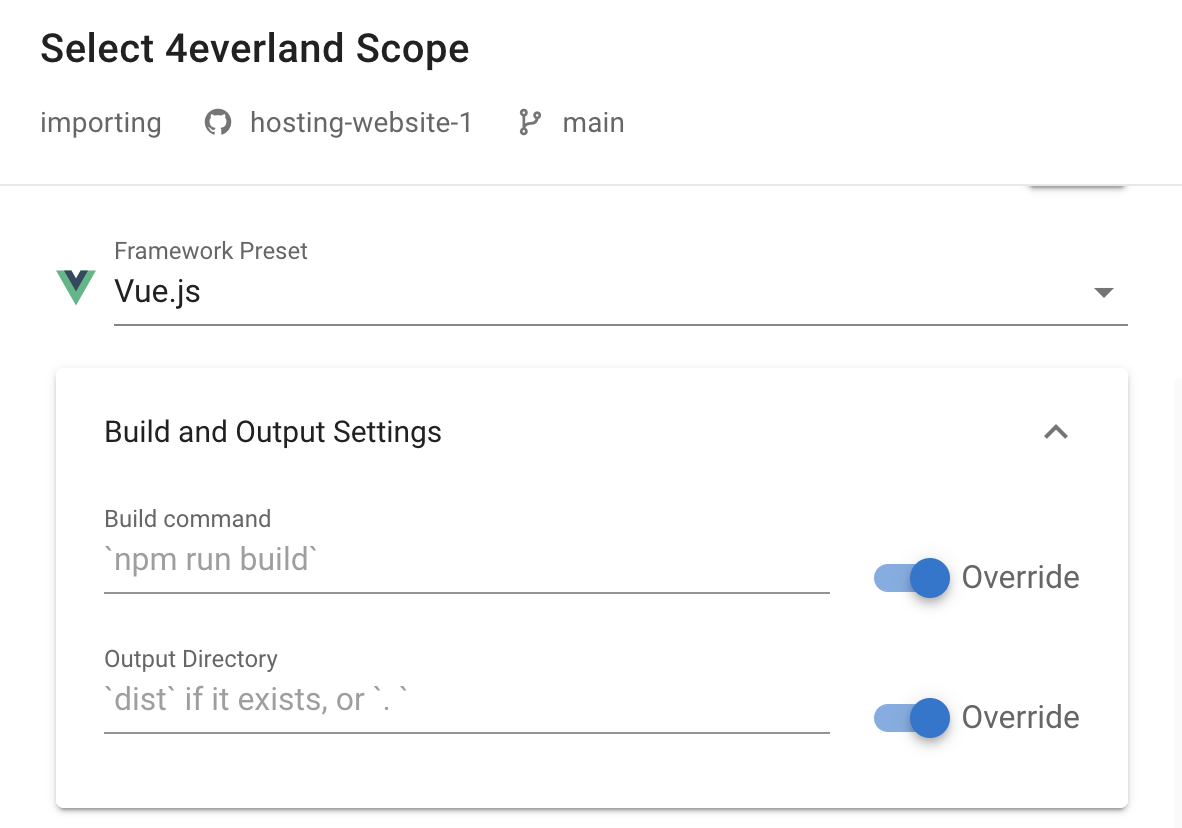
# Step2: Configurate Build Settings
A default framework should be selected after root directory is set. A framework would have default Build Commands and Output Directory, switch on Override to override default settings.
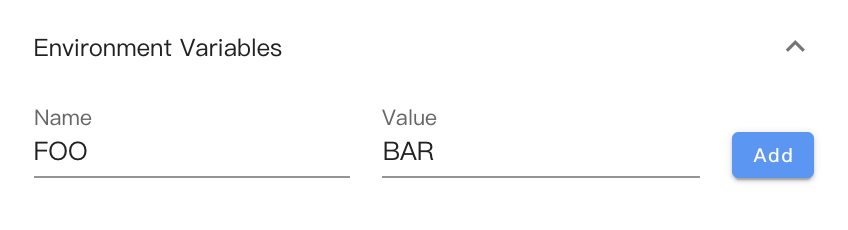
# Step3: Environment Variables
Optionally, Set Environment Variables if required, which could be accessed via process.env.VARIABLE_NAME in your code.
Click on deploy to continue, then a new build process will be started.
# Step4: Checkout build status
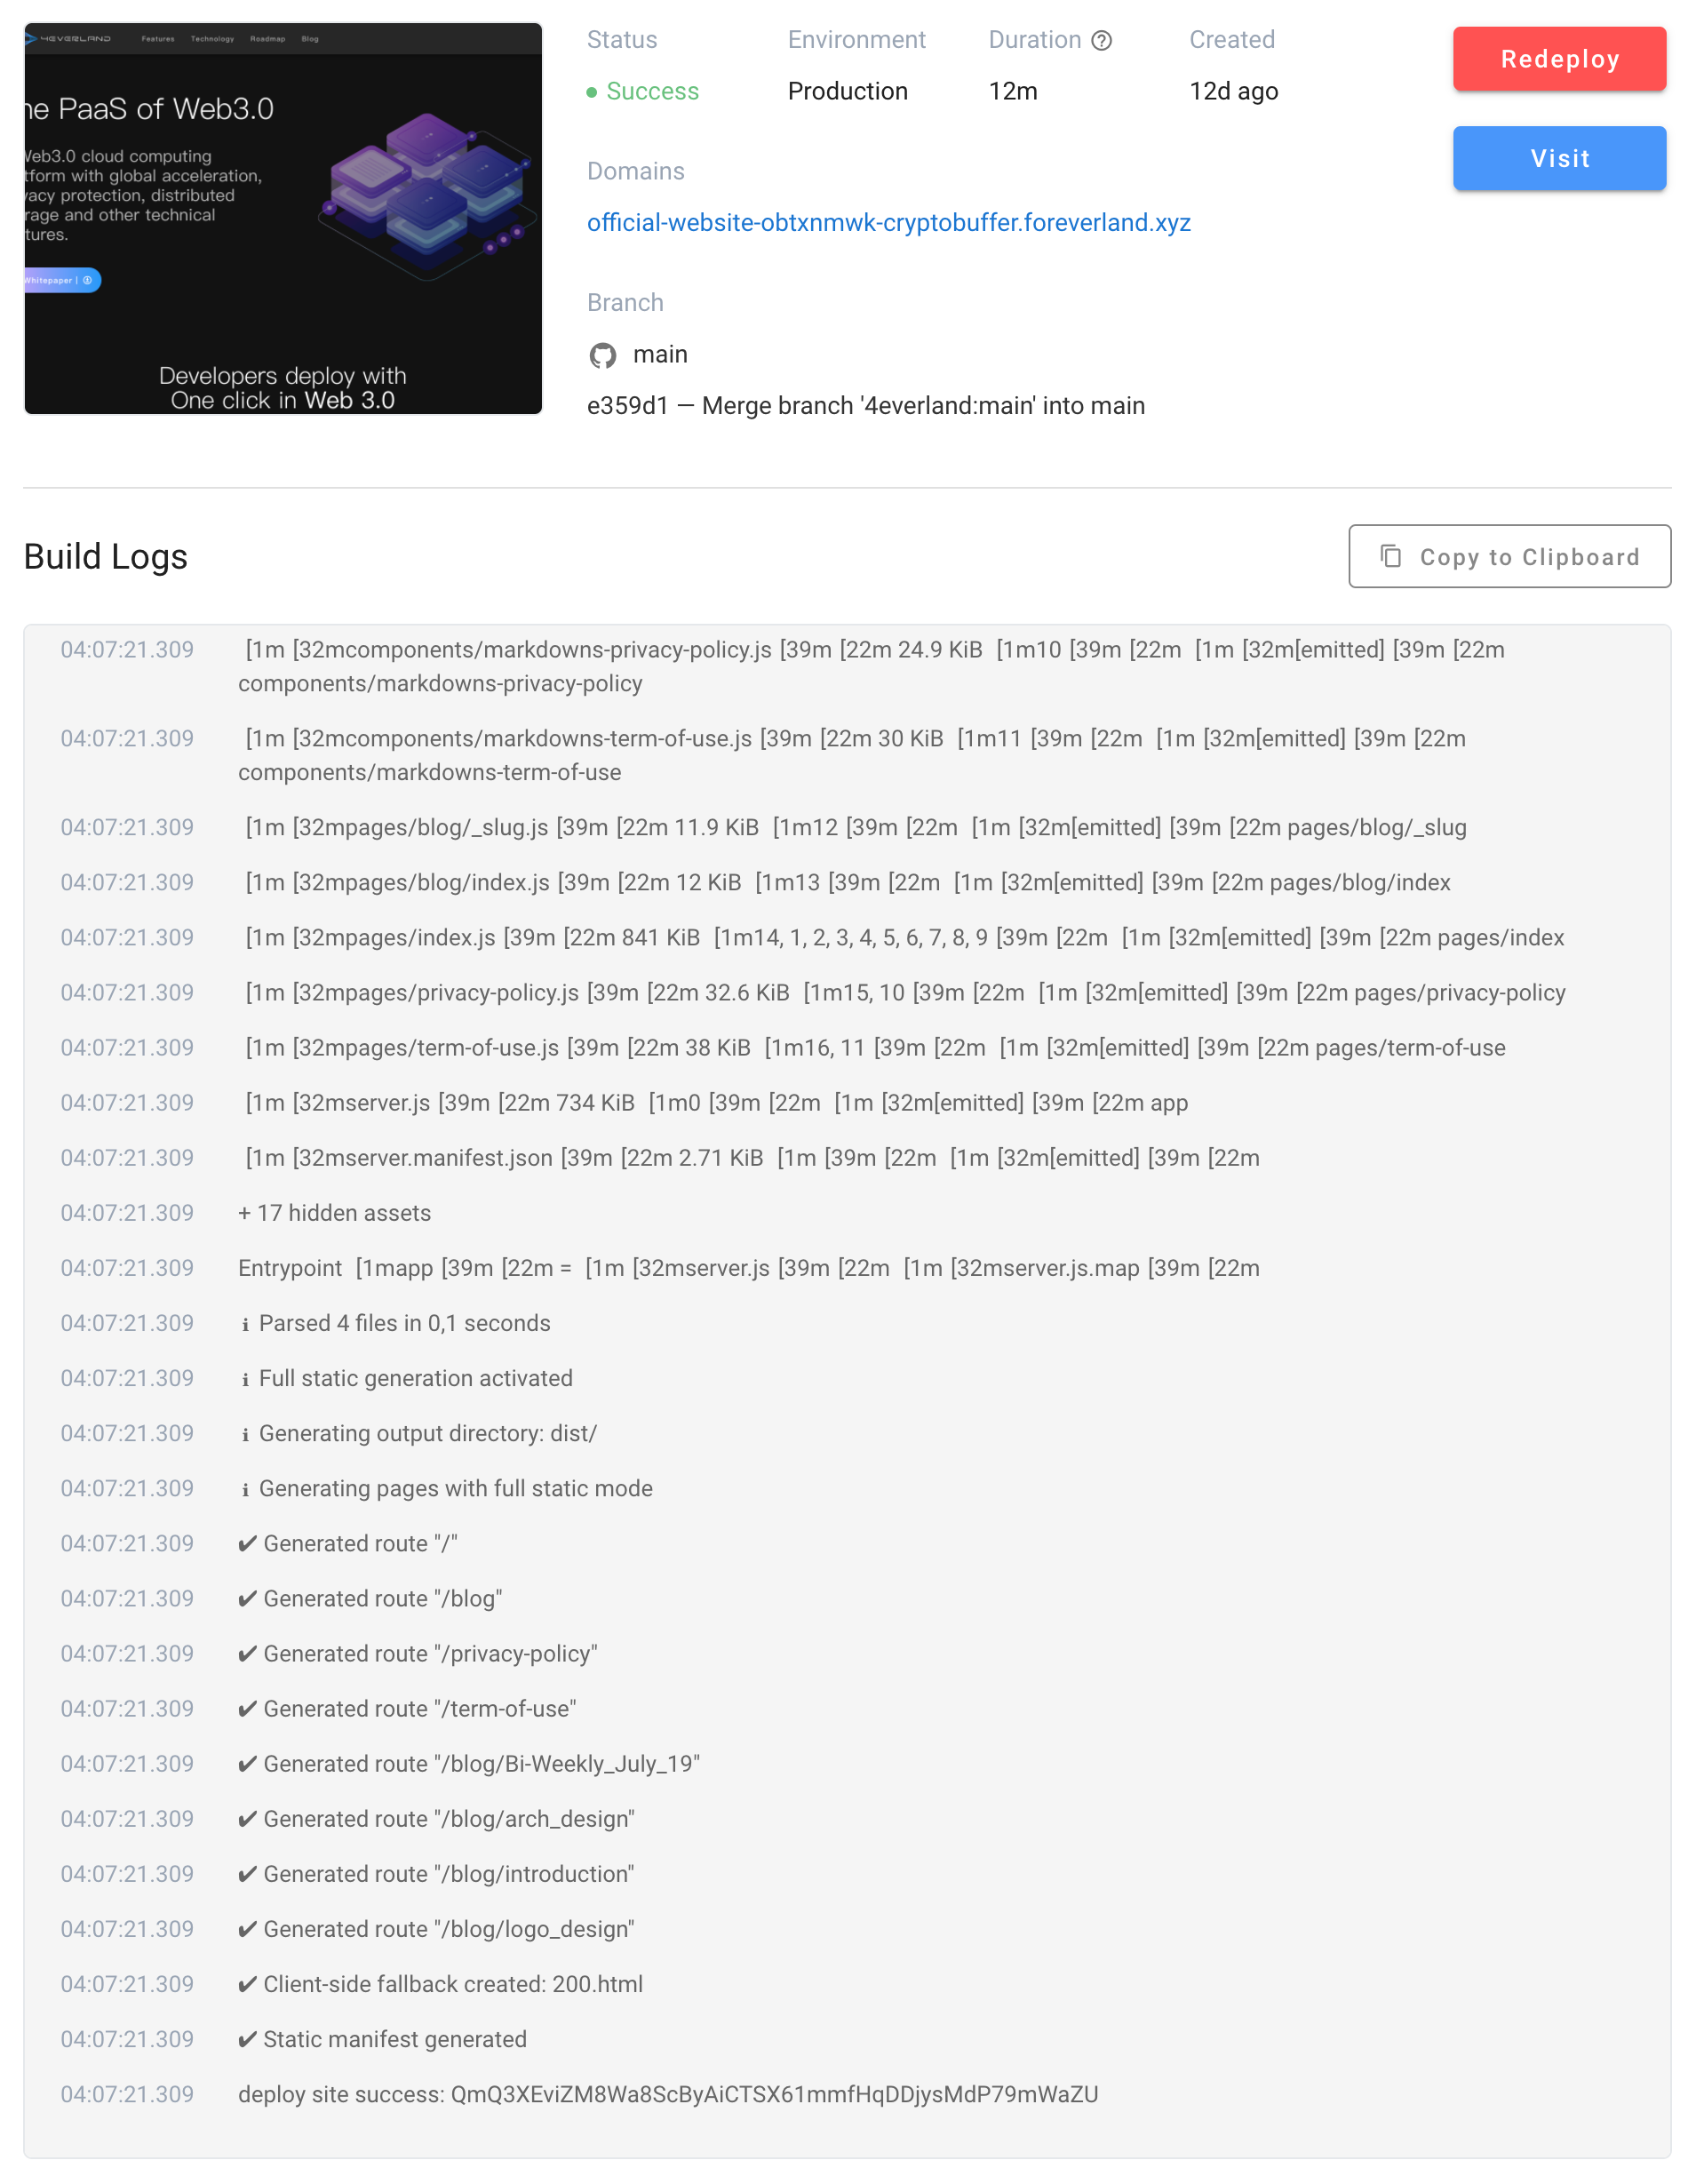
Build status:
- Created: A new task is created
- Queued: The task is pending in a queue, should be processed soon
- Running: The task is running in progress
- Success: All building steps, deployment steps is done
- Failure: Exception/Error while building or deploy the site
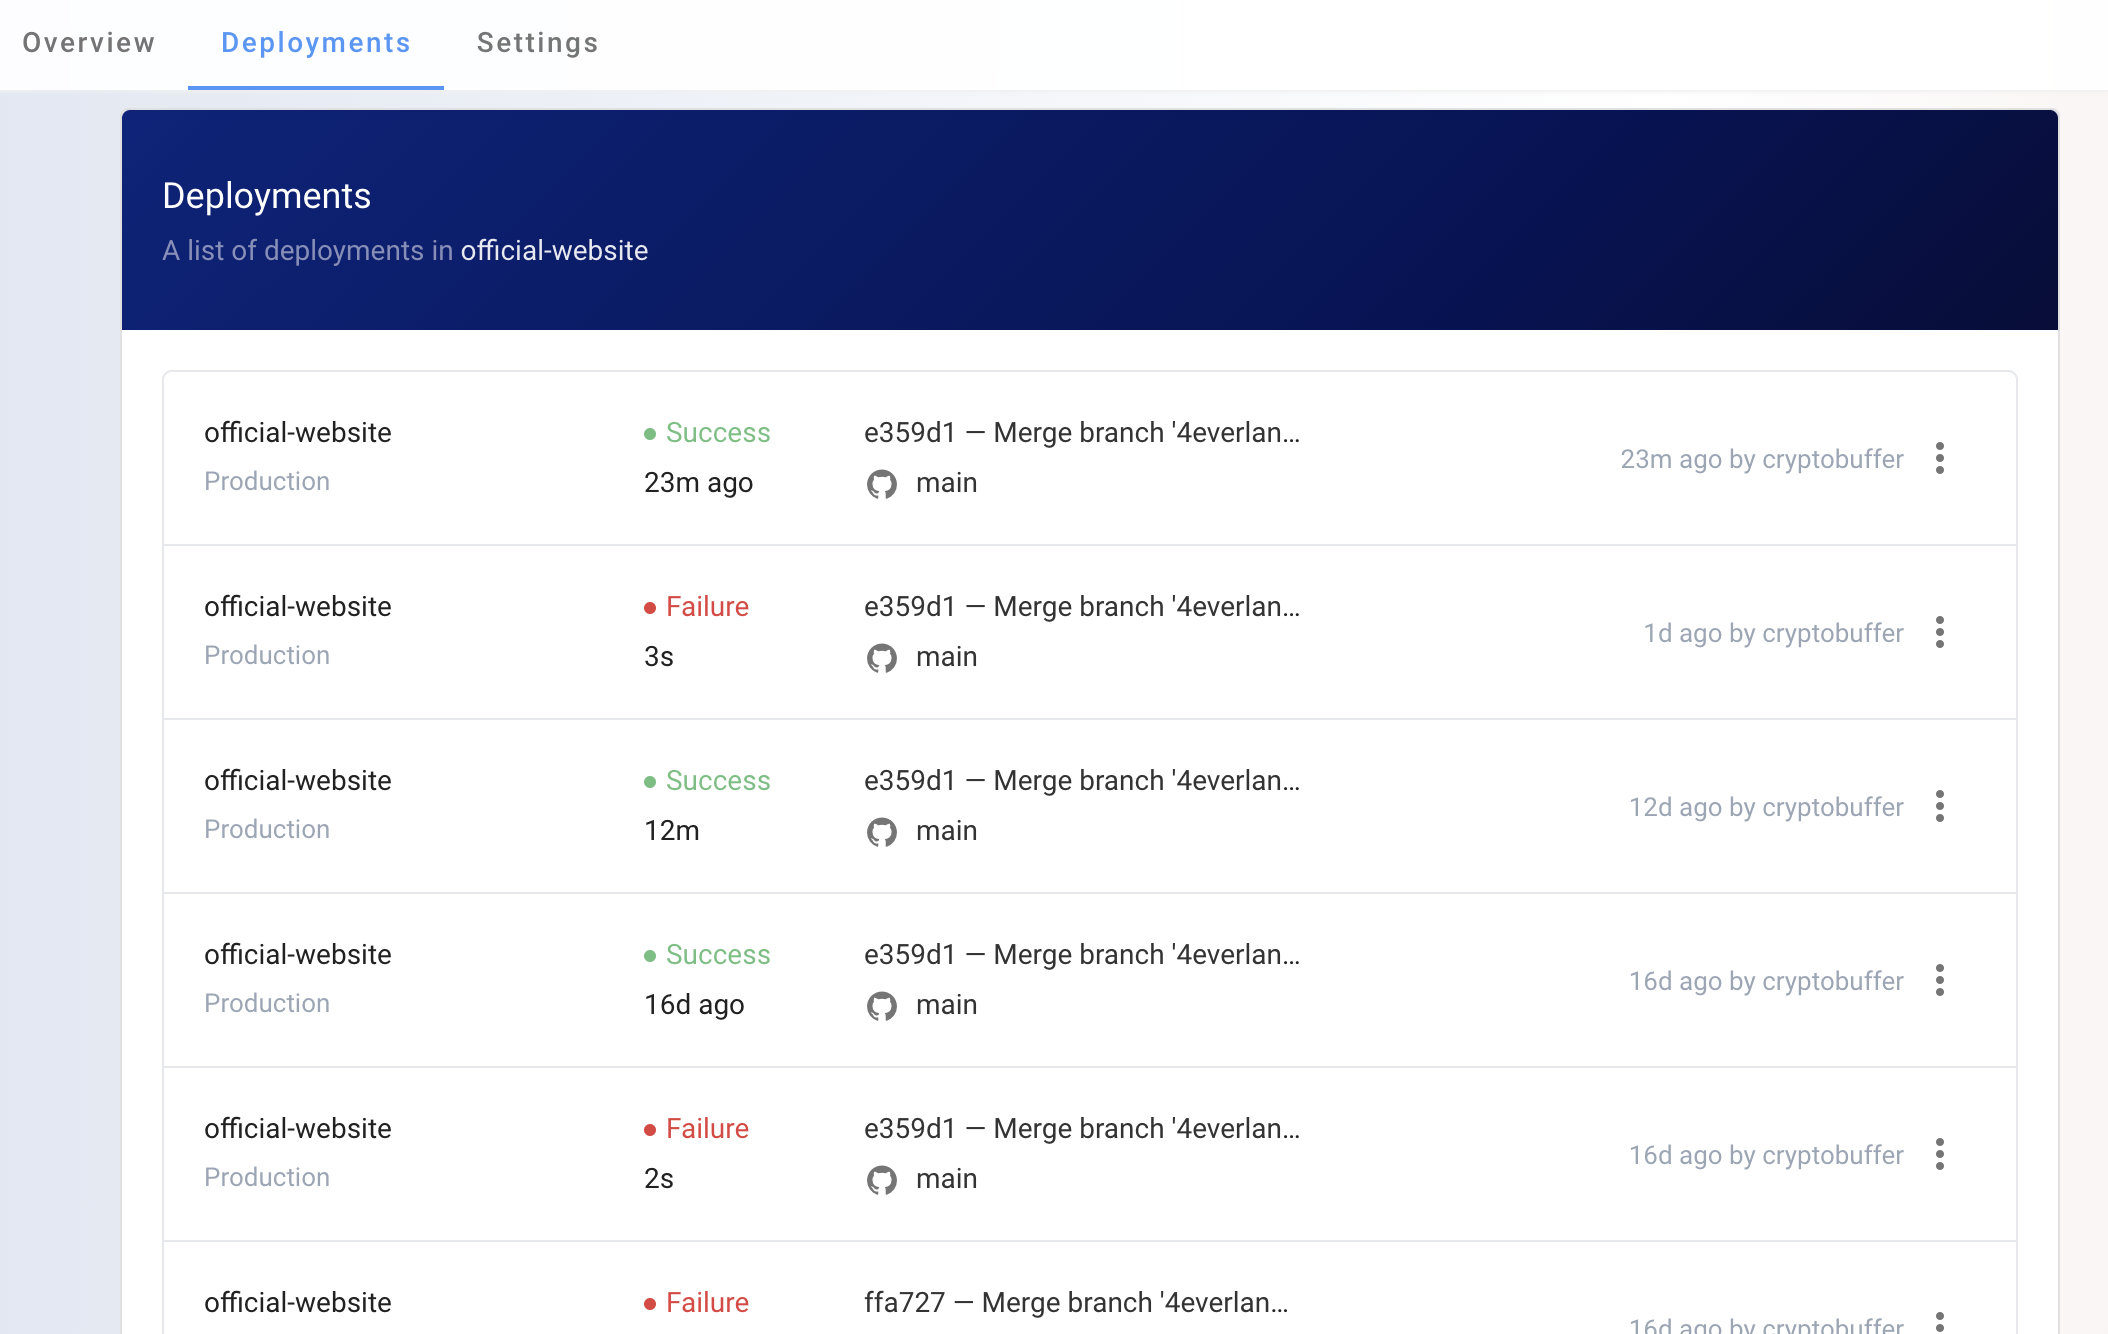
# Step5: Checkout deployment history
- Click on the logo to return to the project list
- Click on a project to checkout details
- Click on
Deploymentson the navigation tab to checkout deployment histories
If the build steps failed and build settings needs to be updated, checkout Project Settings